The ridges on my fingernails say enough.
When you have dry, brittle, and ridged fingernails, it can often mean you have a chronic illness and/or a nutritional deficiency on board.
I have both, despite eating as much as I possibly can shovel in. Part of this is because I’m a triathlete, and my body’s daily nutritional needs are high. And part of my deficits are because my small intestine gets its own workout when it needs to process and then distribute my medically-restricted diet to the rest of the body. Usually, my finger and toenails show up these deficits in the form of dry, brittle, and ridged nails and occasionally funny-colored nail beds. And my upper body has a tendency to look quite “leaned out” without even lifting weights. Wah wah wah. But it’s a struggle, and I know I am not alone.
Each time I hear someone comment that Celiac Disease and food allergies, with their restrictive diets, make it easier to stay thin, I just want to cringe. The idea that CD and gluten free eating with food allergies could ever be construed as the new fad diet or an eating disorder reminds me how much misinformation floats about the Internets. By now, most of us should know that eating gluten-free, in and of itself, is no guarantee of magical weight loss. Gluten free eating that is not paired with sensible macro and micro nutrient balance can be nutrient poor even if it is calorically enhanced.
Nutrition for the person with Celiac Disease and food allergies and intolerances is focused on a formula of nutrition first, flavor and texture second (so you’re more likely to keep up with it), and easy to source and prepare the foods (to defy the lazy factor) third. With all that, I try to keep the making of food FUN FUN FUN, because I completely understand that if it isn’t fun, you and I are going to be hungry. And when we’re hungry, we’re less likely to make good decisions that keep us healthy.
Case in point: at the end of the 2015 Mt. Si 59 mile Relay race, I was so hungry, I ate a fruit roll up that was available at the finish line. I saw that it had high fructose corn syrup in it, which is a no-no food for me. Yet, I was so hungry, I stuffed two of those fruit roll ups in my mouth, hoping for the best. This is as real as it gets. I was so hungry, I was willing to risk my guts falling apart.
There has got to be something better! Something easy. Something tasty, And something nutritious. And I think I found one solution: a post-workout, or post-meal beverage that is gluten free, soy free, dairy free, vegan, nut free, and can be made sugar free, if you like.
What is this beverage, you might ask? Dairy free cacao powder milk, that’s what!
Dairy Free Cacao Powder Milk, FTW!

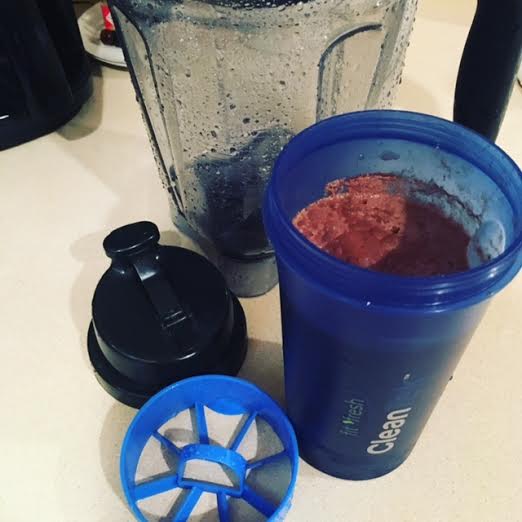
Need a go-to drink to get a little more added protein without the allergens found in other powders? Photo credit: Imei Hsu (iPhone 5SE).
In designing a dairy free chocolate milk, I had a few items on my wish list. First, it had to be gluten free, dairy free, soy free, and nut free. Second, it could not contain an emulsifier or preservative, so there went your common boxed or cartoned milk alternatives. Third, it needed to have a decent amount of protein per serving. Fourth, it had to taste good enough to want to drink it often. Finally, it had to be stupid simple to make, so I could always have the ingredients around, and I could throw it together, even if I were in the foggy stupor of “Uber Hungry”.
Brown rice, while not a Paleo food nor an AIP-friendly food, is one of the few grains that I find quite a number of people with Celiac Disease can tolerate. If you have gone through an Elimination/Provocation trial and found no reactivity to rice, brown rice is going to be your friend. Brown rice has four grams of protein per one cup serving.
Next, I looked at cacao powder versus cacao nibs. The nibs are considered more nutritious, but they are not as convenient to make things with uncooked, as they will not stay well blended. Cacao powders will still have about one gram of protein per teaspoon; cocoa powder may be pure, or may have an added ingredient. Read the label, and choose wisely.
I hit the kitchen, filled my Vitamix blender on low speed, and then tried a number of combinations. Here’s my version of Dairy Free Cacao Moo!
2 cups of cold water
2 teaspoons of pure cacao powder (or pure cocoa powder, if that’s what you have)
1/2 cup to 1 cup of cooked brown rice, cooled
1 teaspoon pure maple syrup (optional)
Place ingredients in a high-speed blender, starting with a low speed (so the ingredients have a chance to combine instead of being flung to the rim of the blender cap). As the ingredients combine, slowly increase the speed to high. Blend at high speed for two minutes. When finished, brown rice should be completely blended into a rich, dark-brown shake with just a little froth at the top from being aerated.
Pour shake into a container and refrigerate for 20 minutes, or place in freezer for 10 minutes. I use a Clean Tek container, because it has a sifter ring insert to help keep ingredients well mixed between uses, and the pour spout means I spill less on my workout clothes, ha ha. There are new bottles that have a built-in agitator, but I’m seeing some reviews that these are sometimes hard to clean. Aim for a BPA free plastic or stainless steel container, and you’re good to go.
While you can add ice chips and turn this into a smoothie in the blender, I don’t recommend you do this. Why? Many of us just need to slam this drink down to get extra calories, and I find that adding the ice chips and froth makes me feel fuller faster. Translation: I won’t finish the whole drink, and I really need the calories!
If you are able to tolerate peas and other legumes, you may try adding a teaspoon of pea powder or cooked peas by the teaspoon full, to add additional protein. It will give the drink more of an earthy flavor, so you may find that you wish to blend in more maple syrup, or try blending in a date for sweetness. I have not tried adding beet juice, but if you’re adventurous, I imagine the beet juice could work nicely.
Happy Eating (and Drinking)! Let’s see your chocolate moo lip stains after you enjoy a container of your own cacao or cocoa powder moo. And I hope you’ll experience how easy it is to make food fun again.


