
Description
Add fermented food into your diet easily with homemade daikon and cabbage. This easy recipe can be made with minimal equipment, sterilized mason jars, and simple ingredients.
Ingredients
1/2 cabbage (cut or shredded by hand)
1 to 1-1/2 large daikon, knife chopped into 2-3 inch long chunks
Make the following for each jar (one cabbage, one daikon):
1-1/2 to 2 Tbsp salt (it is very salty at 2 Tbsp, but that is my palate)
1/2 Tbsp black pepper
1/2 Tbsp pepper corns
1/3 cup white vinegar
2 Tbsp lemon juice
Optional:
1/4 – 1/2 Tbsp red pepper flakes (omit if sensitive to nightshades; I found some that do not have alliums, which are sold in Whole Foods and also Mexican grocery stores)
1/4 cup raw sugar (omit if you are on a low-sugar diet)
Instructions
You will need the following:
1 large pot for boiling and sterilizing jars and lids
2 large pickling glass jars, preferably mason jars with wide-mouth lids
Mix all above ingredients into two large salad bowls, one batch for each type of vegetable. Toss gently every two hours to make sure the vegetables are coated evenly. Leave at room temperature for the first half day and night; you can cover it with plastic wrap or a lid. Transfer the vegetables to the jars the next day.
Sterilize the jars and lids before transferring the vegetables from the large bowl to your pickling jars. You can set them in a warm oven on a baking sheet if you like. If the jars are larger than your pot, I use a kettle and boil extra water, and when the jars are boiled, I take them out to the sink using tongs and pour the boiling water from the kettle over the tops and sides of the jars, just to ensure that they are completely sterile.
I recommend that you fill the mason jar 3/4 full, leaving headspace simply because it is easier to shake and rotate the bottle gently to keep all the vegetable coated. You won’t need to open the jar every day to stir the vegetables. This is a bit different than the type of pickling where you submerge the items in liquid, such as when you make salty preserved duck eggs; there is no submerging.
After you have transferred the vegetables and their juice to the pickling jars, seal the jars tight, and refrigerate. Over time, the vegetables will release their juice as it combines with the vinegar. The more water the vegetable has, the more juice you will see. I place the jars on their sides, and simply give each jar a spin or two each day for two weeks.
You should not need to open the jars to “off gas” the jar; the fermentation is not so quick as to necessitate this. However, if you added sugar, it will ferment more quickly, and I do recommend that you open the jar and let out the air. Failure to do this may make your mason jar lid very difficult to remove.
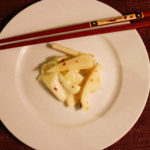
On the 14th day, you are ready to sample the vegetable to see if it’s ready. The vegetable will have taken on a light beige appearance, much like you would see with a jar of sauerkraut from the store.